I first started raytracing all the way back in 2004, when I and a few of my classmates decided to use a freeware raytracer called POV-Ray (more about it later) to create a puzzle adventure game for a school project.
Let's be perfectly clear here: POV-Ray is a text-based raytracer with minimal GUI. Using it is very much like programming in C or a similar language. Before I started this project, not only had I never used the program before, but my knowledge of programming was limited to some fairly simple stuff in modified BASIC. Making a computer game is a lot of work. Making a reasonably-immersive 3-D graphical environment for a game is usually the domain of professionals, who have a lot of fancy toys to speed the process up. Looking back on the project, I think it's a miracle that we finished it at all, much less that it turned out halfway presentable.
After that sink-or-swim introduction (say "steep learning curve" ten times fast), I was pretty well hooked. The transformation from a bunch of text to an incredibly-detailed image still manages to amaze me, when I think about it. The idea that math could be used to describe art so concisely and elegantly is, in my opinion, simply fascinating.
I would highly recommend POV-Ray to people interested in raytracing. The text-based interface is extremely powerful, and what the raytracer is actually doing (which is surprisingly simple) isn't that hard to figure out for people who are so inclined. This more than makes up for the learning curve, unless you just want results now and don't care about understanding the process. (If so, I'd say this probably isn't the website for you.) There are other benefits to POV-Ray's model, as well. Since the overwhelming majority of scene objects are described as mathematical functions instead of collections of triangles, it's possible to "zoom in" with arbitrarily high accuracy, much like vector graphics in 2-D.
To download POV-Ray (it's free, which is another thing I like about it), go here: 
Even if you don't want to download the program right now, it's worth checking out their Hall of Fame, which is filled with some incredible artwork.
Past Work
So, what have I done since then and now? Well, a lot of dabbling, but not a whole lot that I'd call ready to see the light of day.
My most polished work is a fairly simple still-life of some glasses on a nondescript wooden surface.
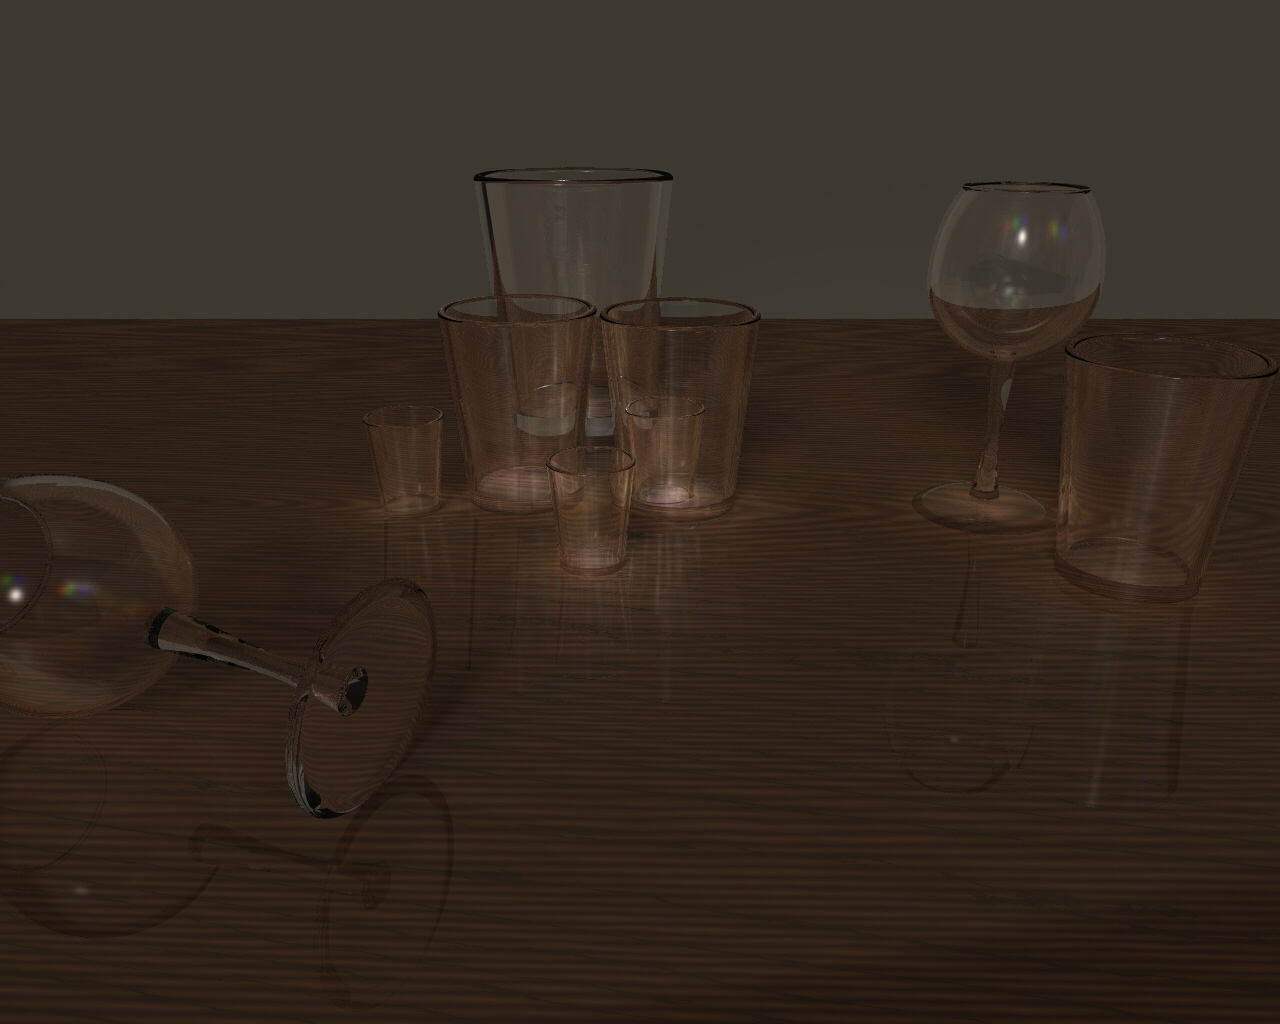
The scene is not terribly complicated, but it took a lot of fiddling to get right. And with all those transparent objects, plus photons, rendering is quite slow for such a simple scene. The 1024x768 version of this took most of a day to render, and that was at fairly low quality settings, all things considered. The source code can be found below:
Current Projects
Right now, I'm playing around with media, trying to make realistic stars and nebulae. I had thought of making a galaxy scene, initially, but in order to do it right (possibly hundreds of millions of separate objects, light sources, and complex media interactions with each one), I'd need a computer with far more memory and processor power than this one, and a couple of months at least to let it run. It's certainly not a realistic project at the level of detail I'm currently using.
Below is a macro that I created that produces a main-sequence star of arbitrary luminosity. It's rather hackish, as the comments indicate, because for some reason, wrapping the whole thing in a union{} or merge{} statement makes it not work correctly. Therefore, I had to add translation capability into the macro manually, instead of allowing the whole thing to be translated after-the-fact. There's also another hack that adds an invisible sphere around the whole thing to get rid of an artifact that occurs when the star is inside another media-filled object.
The body of the star is roughly 1/10 of a unit in diameter, depending on the luminosity specification you give the macro. Scaling it may be slightly complicated.
When the star is placed near a large solid object, or in a dense media field, it has the potential to wash out large chunks of the scene. If you think about it, that's fairly realistic behavior. Stars produce a lot of light. When a planet-sized object was placed a realistic distance away, illumination seemed fairly realistic. (It takes a very high-resolution render to test this, by the way.)
I also have a material that uses weighted random numbers to create a nebula-like scattering media. I'm reasonably happy with the way it's working so far, but it is a bit unpredictable in color (the disadvantages of using random numbers) and not unpredictable enough in shape.
Finally, I'm using random numbers to place these elements. The star placement code works okay, but I'm having problems with the nebula that I think are coincident-surfaces issues. I don't see a good way to get rid of them, so I may have to resort to manual placement.