Wood Chipper
I started this project in the spring of 2008, and worked on it off and on all summer. The budget for the entire project was about $400, and it works very well now that it's essentially done. (I still haven't painted the chute or installed a battery, but it works fine as of now.)
The first thing I did was, of course, design it. I settled on a 12" dia. disc so I could turn it in my lathe to true it up--unlike Steve Bedair, I didn't have the luxury of a perfectly plasma-cut disc just laying around at the local junkyard. That worked out to a 3" capacity, which was plenty for yard work, and about 6-7 HP needed. I later sprung for an 11HP motor because it had electric start--there is plenty of extra available power with the bigger motor. The original design called for a simple direct drive. I later changed to belt drive in order to isolate the motor from the vibrations of the cutting head, and to protect aganist any potential stalling.
The first thing I built was the housing side, by cold-forging a 1/4" thick by 2" wide HRS strap into a suitable curve. If 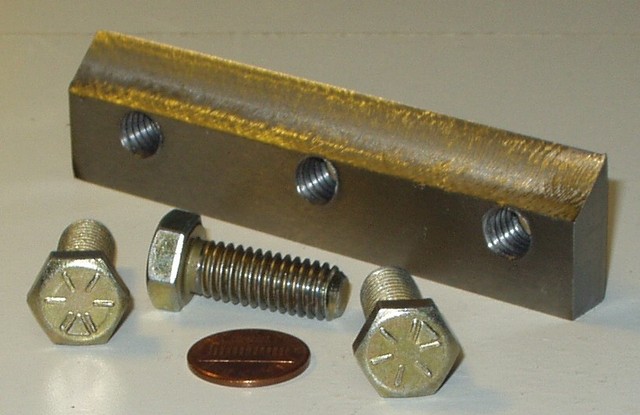 you've never cold-forged heavy steel, it's a lot of very hard, very loud work. After that, I machined the three knives out of 1" by 11/32" (no reason for that particular thickness other than that it was on sale) O-1 bar stock. Each knife is 4 1/2" long, and had to be milled at a 45 degree angle for the cutting surface, drilled and tapped for three 3/8"-16 grade 8 mounting bolts (the heads stay on the back side of the disc, and the other ends are ground flush to the tops of the knives), deburred, ground, hardened, tempered, and sharpened. The picture shows a knife halfway through the process: it's been milled, drilled, and tapped, but nothing else.
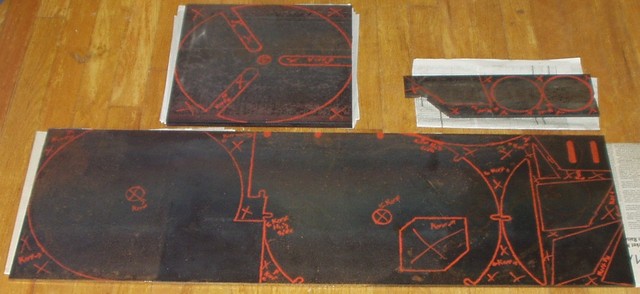 After that, I ordered in some steel--12" x 36" x 1/4" plate for the housing and the beginning of the chute, and 12" x 12" x 1/2" plate for the cutter disc. All the pieces were oxy-acetylene cut at my uncle's farm, then welded together to make the housing front and back with the start of the chute welded on, and the cutter disc. The front of the housing, cut larger for bolts, was drilled, and tapped tabs were welded on the back of the housing to clamp the assembly together. The bolts used were salvaged head bolts from an elderly VW Rabbit.
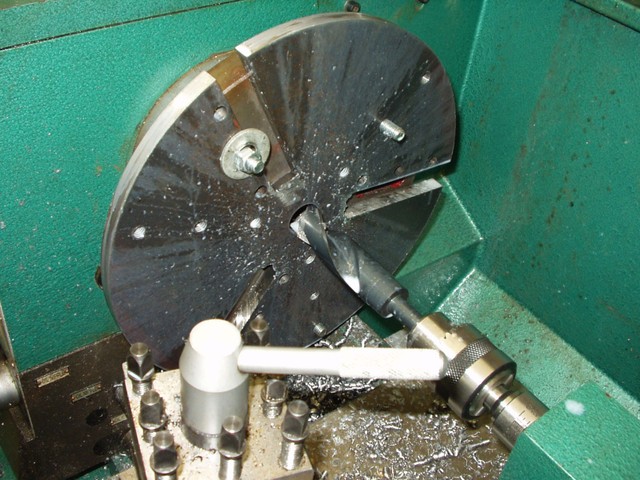
 Once I got back home, I trued up the edge of the disc (chipping a cutter bit in the process on the rough oxy-cut surface) and drilled a center hole for the 1" shaft that the cutter disc would spin on. After that, I milled 1/4" deep recesses to support the back edges of the blades, so the force on the bolts would be primarily tension instead of shear stresses. The extra set of holes in the disc are for the fan blades, which get held on with three
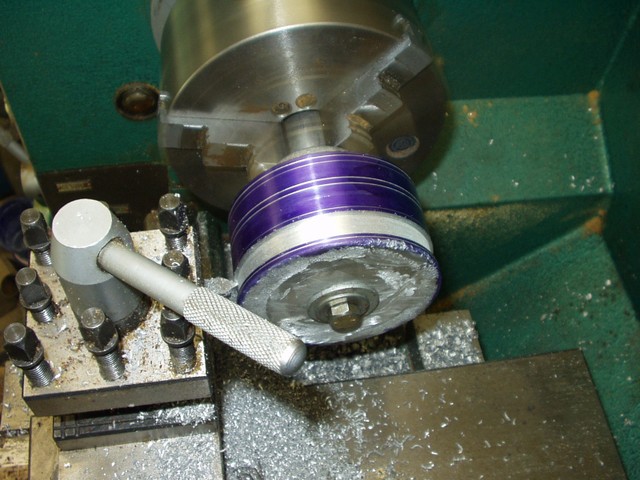 more grade 8
 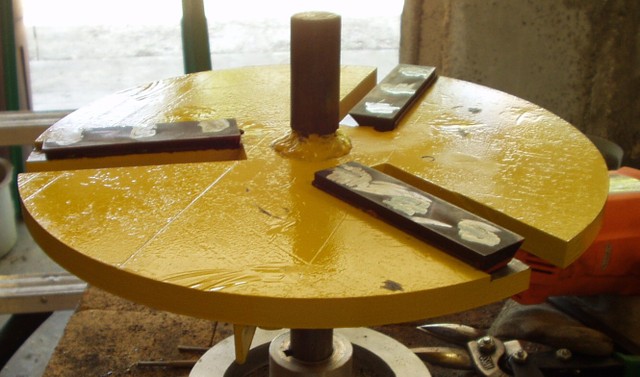 bolts apiece. This time, the disc itself is tapped, and the ends of the bolts are again ground flush to the cutting surface.
It was around this time that I changed the design from direct to belt drive, so I made patterns for 4" and 6" double B belt pulleys, cast them in aluminum, 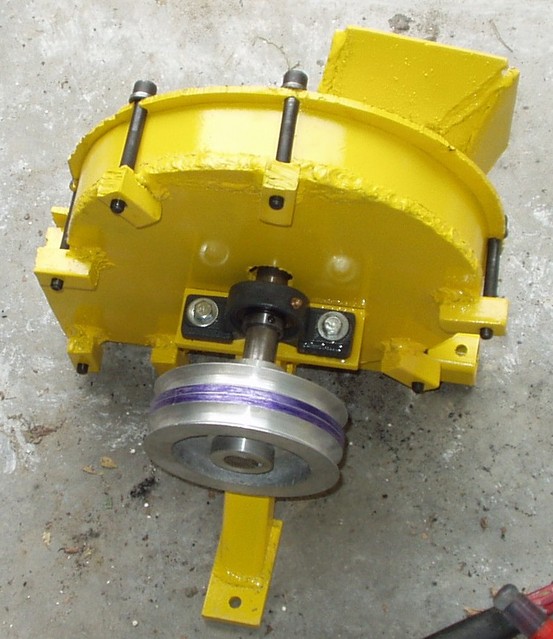 and machined them. I also welded the disc and shaft together, made bearing and frame mounts for the housing, and painted everything.
Then, I built the frame, mounted the motor and cutter head, and put the belts on. Both the motor and cutter head assembly are on rubber anti-vibration mounts, and the cutter head rests in milled slots so it can slide back and forth to adjust belt tension.
After that, I cobbled together a quick chute out of plywood and started chipping. I didn't know what to expect the first time I used it, but it chips well and fast. It doesn't self-feed all that well, nor does it shred leaves and such, but neither of these are terribly problematic in operation.
Here's a short video (no sound, unfortunately) of the chipper in action: